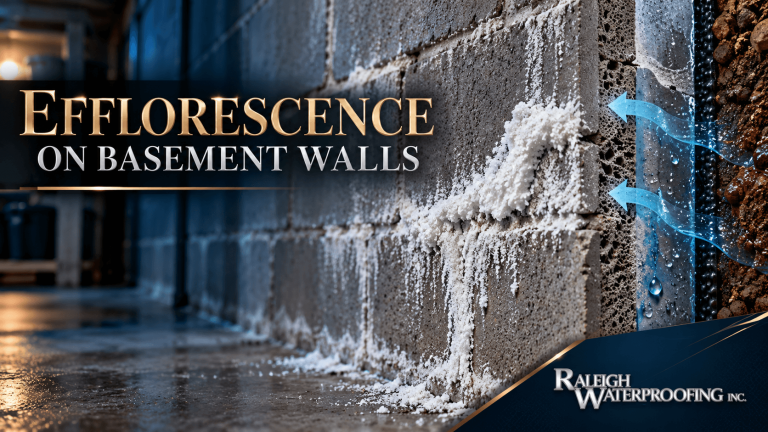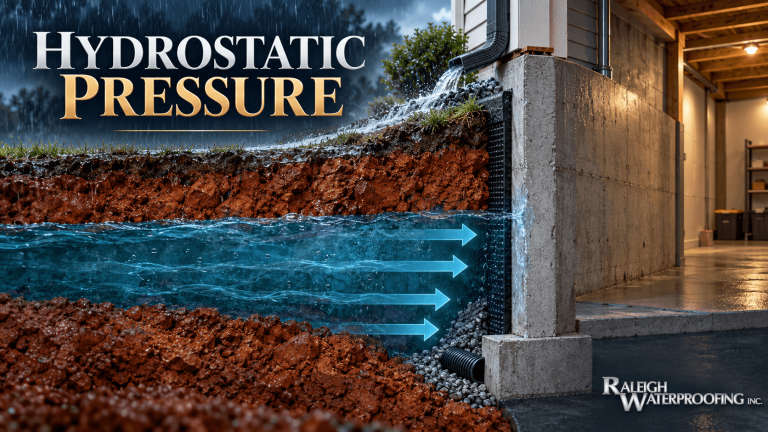
How to Control Crawl Space Humidity After Encapsulation
Quick Answer: crawl space humidity can come back after encapsulation when ground vapor, bulk water, or humid outdoor air is still getting into the space. A liner alone cannot correct roof runoff, negative grading, standing water below the liner, an unsealed crawl access, or a dehumidifier that is fighting a water source. The practical path is to identify the moisture source first, then match the repair: drainage and grading for bulk water, a continuous vapor barrier for ground moisture, sealing for air leaks, and dehumidification for remaining airborne moisture.
An encapsulated crawl space should be easier to control than an open, vented crawl space, but it is not automatically immune to moisture. The visible symptom may be damp insulation, condensation on ducts, a musty odor, a wet liner, or a crawl space dehumidifier that seems to run constantly. Each one is a clue, not a diagnosis. The water source may be outside the foundation, under the liner, at the crawl door, around the rim area, or from plumbing or HVAC equipment that needs a separate trade to evaluate.
Raleigh Waterproofing Inc. approaches this kind of problem by separating moisture into three buckets: ground moisture, bulk water, and humid air intrusion. Once those are separated, the fix becomes clearer. That may mean improving yard drainage, repairing or improving the liner through crawl space vapor barrier work, upgrading a sealed crawl space, adding water collection and pumping support, or diagnosing a water source that was missed during the original encapsulation.
A diagnosis-first plan for crawl space humidity
The first mistake is treating high readings as only an air problem. Humid air is one cause, but high humidity levels can also be the result of water evaporating from wet soil, puddles below a liner, or wet foundation walls after rain. If the source keeps feeding moisture into the crawl space, equipment may run longer without solving the underlying condition.
EPA moisture-control guidance emphasizes source control, including “monitoring the relative humidity” and “controlling humidity in the crawl space to less than 65 percent RH using ventilation, if outdoor air dew points are lower than 55°F, or with dehumidifiers.” That guidance also includes EPA’s recommendation for “installing a vapor barrier over the earthen floor as soon as possible” in crawl-space moisture control. Those are useful principles, but they still need to be applied to the actual house.
For a homeowner, the point is not to chase one perfect number without context. Humidity levels matter, but the trend matters too. Does the reading spike after rain? Does it rise on humid days even without standing water? Does it stay elevated all summer? Does it drop when the dehumidifier runs, then climb again as soon as it stops? Those patterns help separate air leaks from groundwater, surface runoff, and vapor transmission.
Why a sealed crawl space can still get wet
A sealed crawl space is designed to reduce outside air exchange and help control crawl space moisture. It can still struggle when the water source was never corrected. Sealing vents and lining the soil do not stop roof water from dumping at the foundation. They do not regrade a low side yard. They do not repair a disconnected downspout. They do not automatically collect water that is already moving under the liner.
There are four common reasons a sealed crawl space still feels damp:
- Ground moisture: exposed soil, open seams, torn liner areas, uncovered piers, or a liner that does not fully isolate the soil can let vapor enter the space.
- Bulk water: runoff, poor grading, clogged gutters, short downspouts, groundwater, or drainage problems can put liquid water at the perimeter or below the liner.
- Humid air intrusion: gaps at the crawl door, vents, rim areas, utility penetrations, or incomplete sealing can let humid outdoor air enter.
- Condensation: humid air can condense on cooler ducts, pipes, masonry, or floor framing when surface temperatures and dew point conditions line up.
These conditions can overlap. A home might have a good liner but weak exterior drainage. Another might have a dehumidifier that is doing its job, but humid air is leaking through an access door. Another might show water under the plastic after every storm, pointing toward bulk water instead of an indoor air issue. This is why moisture control needs a whole-system view.
Ground moisture, bulk water, and humid air are different problems
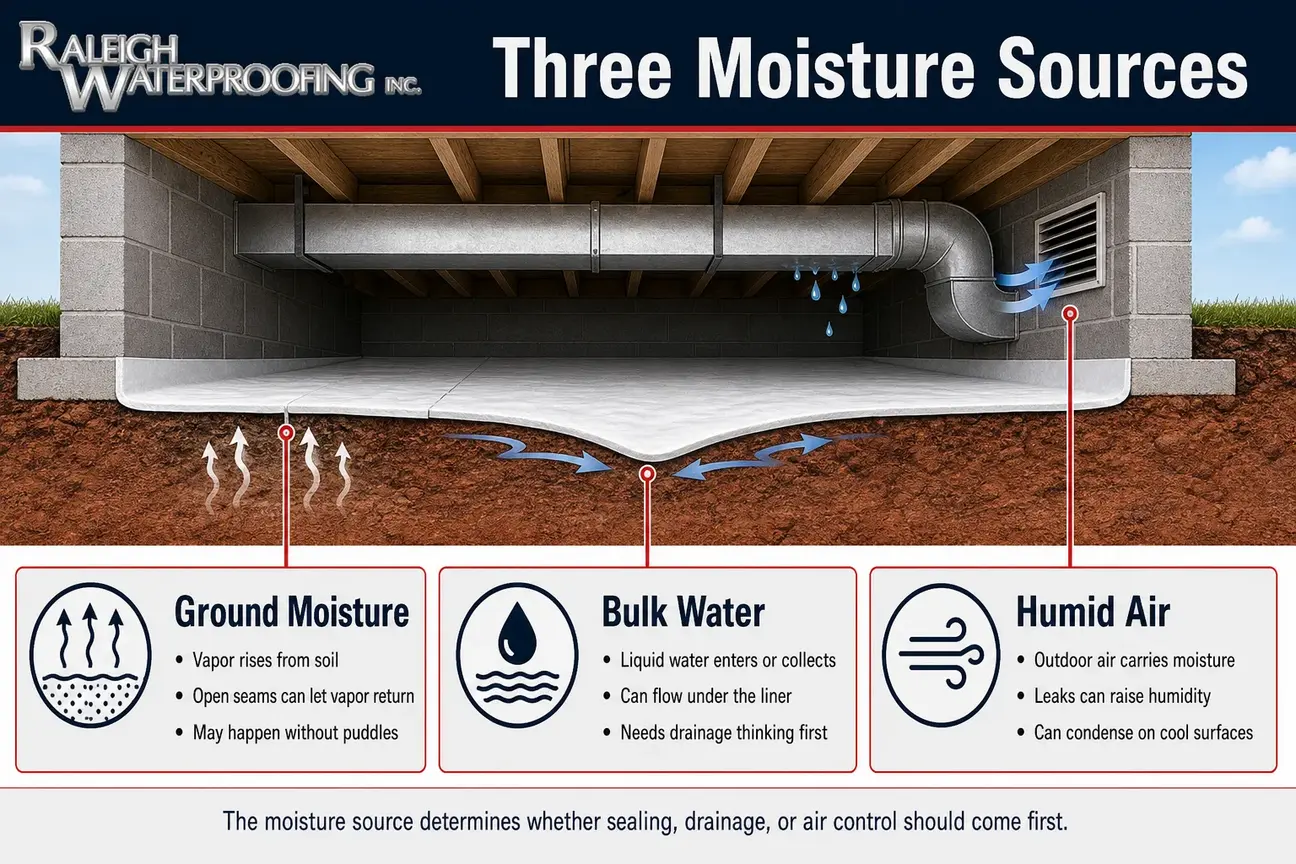
Ground moisture is vapor rising from soil. In an unsealed crawl space, the soil can release moisture continuously into the air. In an encapsulated space, the vapor barrier is supposed to separate that soil from the crawl-space air. When seams open, edges pull loose, or the liner is damaged by traffic or work in the crawl space, crawl space moisture can return even without visible puddles.
Bulk water is liquid water. It may enter at the crawl-space perimeter, flow under the liner, collect at low points, or appear near a foundation wall after rain. Bulk water usually needs drainage thinking before humidity thinking. If liquid water is present, a dehumidifier is being asked to remove moisture after the real problem has already entered the crawl space.
Humid air intrusion is different. In that case, the liner may be intact and the soil may be covered, but outdoor air is still leaking in. In a humid climate, that incoming air can raise humidity levels and create condensation on cooler surfaces. A sealed crawl space should be checked for missed openings, loose crawl doors, open vents, and unsealed utility penetrations.
Where liquid water is present, it needs a path to a safe outlet or collection point before the air side of the system can be expected to stay stable. That does not mean every home needs a sump. It means liquid water should be handled as a drainage problem before the crawl space dehumidifier is expected to manage the remaining airborne moisture.
7 practical moisture control parts that work together
Moisture control is not one product. It is a set of defenses that should match how water is reaching the crawl space. The right combination depends on the property, and not every house needs every measure. The seven parts below are a practical way to think through an encapsulated crawl space that is still damp.
1. Start with the water source, not the symptom
If the crawl space dehumidifier runs constantly, the equipment may be undersized, poorly located, draining incorrectly, or simply overwhelmed by a water source. Before changing equipment, look at when the problem happens. After-rain problems point toward runoff, downspouts, grading, groundwater, or perimeter drainage. All-summer high readings without puddles point more toward humid air intrusion, vapor transmission, or condensation.
This is where a find the water source evaluation matters. A damp corner, a wet liner, or a musty smell can show where moisture is appearing, but not always where it began. Water can travel along soil, block walls, utility penetrations, or low spots before it becomes visible.
2. Move roof and surface water away first
Gutters, downspouts, and grading are not glamorous, but they often decide whether the crawl space stays manageable. Roof runoff that lands beside the foundation can raise soil moisture and add pressure at the crawl-space wall. Downspouts that discharge too close to the house can keep one corner wet long after the rain stops. Soil that slopes toward the foundation can direct water into the crawl-space perimeter.
Good exterior drainage helps the rest of the system work less hard. A vapor barrier is not meant to act like a pond liner. A sealed crawl space is not meant to hide a grading problem. If the yard stays soggy or water flows toward the foundation, drainage and grading deserve attention before assuming the encapsulation failed.
3. Use drainage to handle bulk water
When liquid water is moving toward the crawl space, the answer may involve surface drainage, subsurface drainage, or a combination. The goal is to intercept and direct water to an appropriate outlet without sending it onto a neighbor’s property, into the sanitary sewer, or across a sidewalk. Site conditions, slope, soil, and discharge location all matter.
North Carolina soil conditions vary, and drainage behavior depends on soil movement and spacing. NC State Extension’s drainage guidance explains that soil conditions affect drainage spacing and performance, which is why a wet crawl-space perimeter should be evaluated in context rather than by guesswork. For homes with exterior water movement, NC State Extension’s drainage spacing guidance supports the idea that soil behavior affects how water moves around a property.
In some cases, a drainage correction may be enough to reduce crawl-space moisture loads. In others, drainage may need to work with a liner repair, a sealed access, or pumping support. The important point is that drainage addresses liquid water before it becomes an indoor humidity problem.
4. Keep the vapor barrier continuous
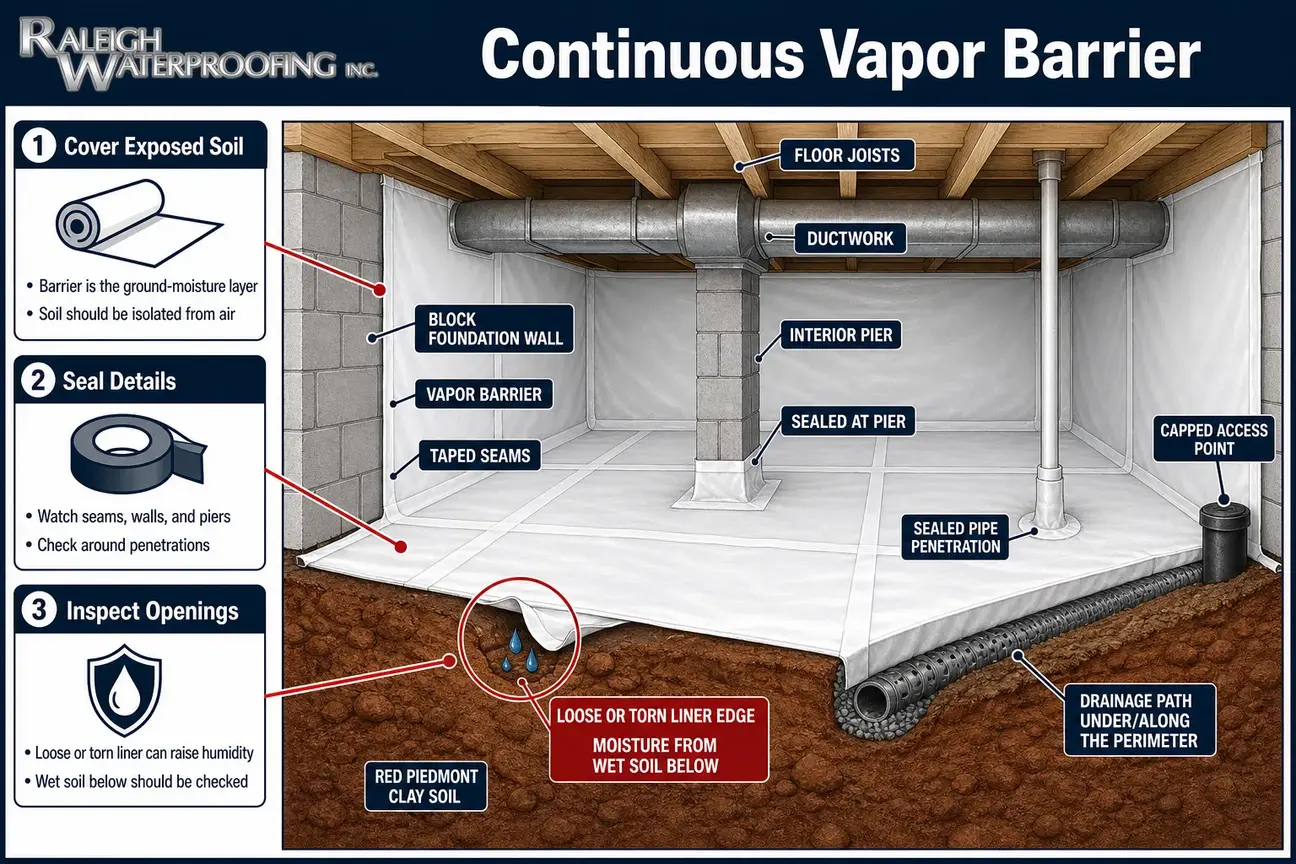
The vapor barrier is the ground-moisture control layer. It should cover exposed soil and be detailed around piers, seams, walls, and penetrations in a way that limits vapor entry. If a liner is loose, torn, pulled away, or sitting over wet soil with water flowing below it, humidity levels may rise because moisture is still entering the space.
Homeowners often notice this as condensation on the underside of the liner, damp smells, or readings that creep upward even when no puddles are visible. That does not automatically mean the entire encapsulation needs to be replaced. It means the liner and the water below it should be inspected. Sometimes the issue is an isolated opening. Sometimes the water below the liner points back to drainage.
If the home already has crawl space encapsulation, an inspection should look at whether the encapsulation is still continuous and whether it is being asked to manage liquid water it was not designed to handle by itself.
5. Seal the crawl space against humid outdoor air
A sealed crawl space reduces humid air intrusion by closing vents, improving the crawl access, and limiting uncontrolled air leaks. That helps because outdoor air can carry a high moisture load during humid weather. Once inside, that air can raise humidity levels or condense on cooler surfaces.
Sealing is not the same as ignoring ventilation or mechanical control. It means the crawl space should be managed intentionally, not left open to weather. If a sealed crawl space still has high readings, the access door, vent closures, band area, pipe penetrations, and utility openings should be checked. Small gaps can matter when humid air is entering for months.
Closed crawl-space work can also have code and permitting implications. The NC OSFM interpretation page for closed crawl spaces states “permit required” for the interpretation it addresses, so homeowners should confirm requirements with the local building department before work begins.
6. Size and drain the crawl space dehumidifier correctly
A crawl space dehumidifier controls remaining airborne moisture after the major water sources are addressed. It should not be treated as a substitute for drainage, a working vapor barrier, or sealing. If it is removing moisture from a steady source of liquid water, it may run often and still struggle to stabilize the space.
Placement, drainage, service access, and discharge routing all matter. A unit that drains into a poor location can create another moisture problem. A unit that is blocked by storage, poorly maintained, or disconnected from its drain may not control the space as intended. A unit that is asked to serve a leaky or wet crawl space may appear to be the problem when it is actually showing that moisture is still entering.
Good diagnosis asks what the crawl space dehumidifier is responding to. Is it responding to ordinary seasonal humidity? Or is it responding to wet soil, bulk water below the liner, or an air leak? That distinction affects whether the next step is equipment service, sealing, drainage, or sump support.
7. Add sump support only when water collection needs it
A sump station is not a cure-all for every damp crawl space. It is useful when collected water needs to be moved from a low point to a suitable discharge. If water is collecting below the liner or at the crawl-space perimeter and gravity drainage is not practical, a sump station may be part of the water-management plan.
The sump should be thought of as part of a drainage system, not as a replacement for grading or a vapor barrier. Water still needs to be collected properly, pumped safely, and discharged to an appropriate location. The discharge path matters because water that cycles back toward the foundation can keep the problem going.
Electrical and pumping work is not a good DIY guessing game. Homeowners can document what they see, but sump installation and electrical connections should be handled through appropriate trades and local requirements.
What the symptom usually tells you
The table below is not a diagnosis. It is a way to organize clues before an on-site evaluation. The same symptom can have more than one source, so the pattern matters.
| What you notice | Possible moisture source | Fix that may match the cause | Trade-off or limitation |
|---|---|---|---|
| Humidity rises after rain | Runoff, downspouts, grading, wet soil at foundation | Exterior drainage, grading correction, gutter and downspout improvements | Air equipment may still be needed after bulk water is reduced |
| Water below the liner | Bulk water, groundwater, perimeter leakage, low-point collection | Drainage evaluation, liner correction, possible sump support | A dehumidifier alone does not remove the water source |
| Damp smell without puddles | Vapor transmission, humid air leaks, condensation | Vapor barrier repair, sealing, crawl space dehumidifier evaluation | The smell location may not be the original water source |
| Condensation on ducts or pipes | Humid air meeting cooler surfaces | Air sealing, dehumidification, HVAC or insulation evaluation where appropriate | Plumbing or HVAC defects may need the right trade |
| One wet corner after storms | Downspout, grade slope, exterior drainage issue, wall entry point | Localized drainage and perimeter inspection | Water can travel before appearing at the corner |
| Dehumidifier runs constantly | High moisture load, air leak, wet soil, liquid water, equipment issue | Source diagnosis before equipment changes | Runtime alone does not identify the cause |
Raleigh conditions that can affect crawl space moisture
Raleigh homes can deal with humid outdoor air and rainfall that expose weak spots in drainage. The Triangle also has many crawl-space homes, and both older houses and newer homes on compacted fill can struggle when water is directed toward the foundation instead of away from it.
Soil that drains slowly can keep the ground wet around a foundation after rain. When the soil stays wet, moisture can continue moving toward or below the crawl space after the storm is over. That is one reason a homeowner may see the crawl-space reading rise after rain, not only during the rain itself.
Local conditions do not replace site-specific diagnosis. Two houses on the same street can behave differently because roof size, gutter layout, downspout discharge, grading, crawl access, drainage outlets, and liner condition differ. This is also why waterproofing is only as good as its drainage. A clean liner and a good dehumidifier can still be undermined by water that is being delivered to the foundation every storm.
What homeowners can safely check before an evaluation
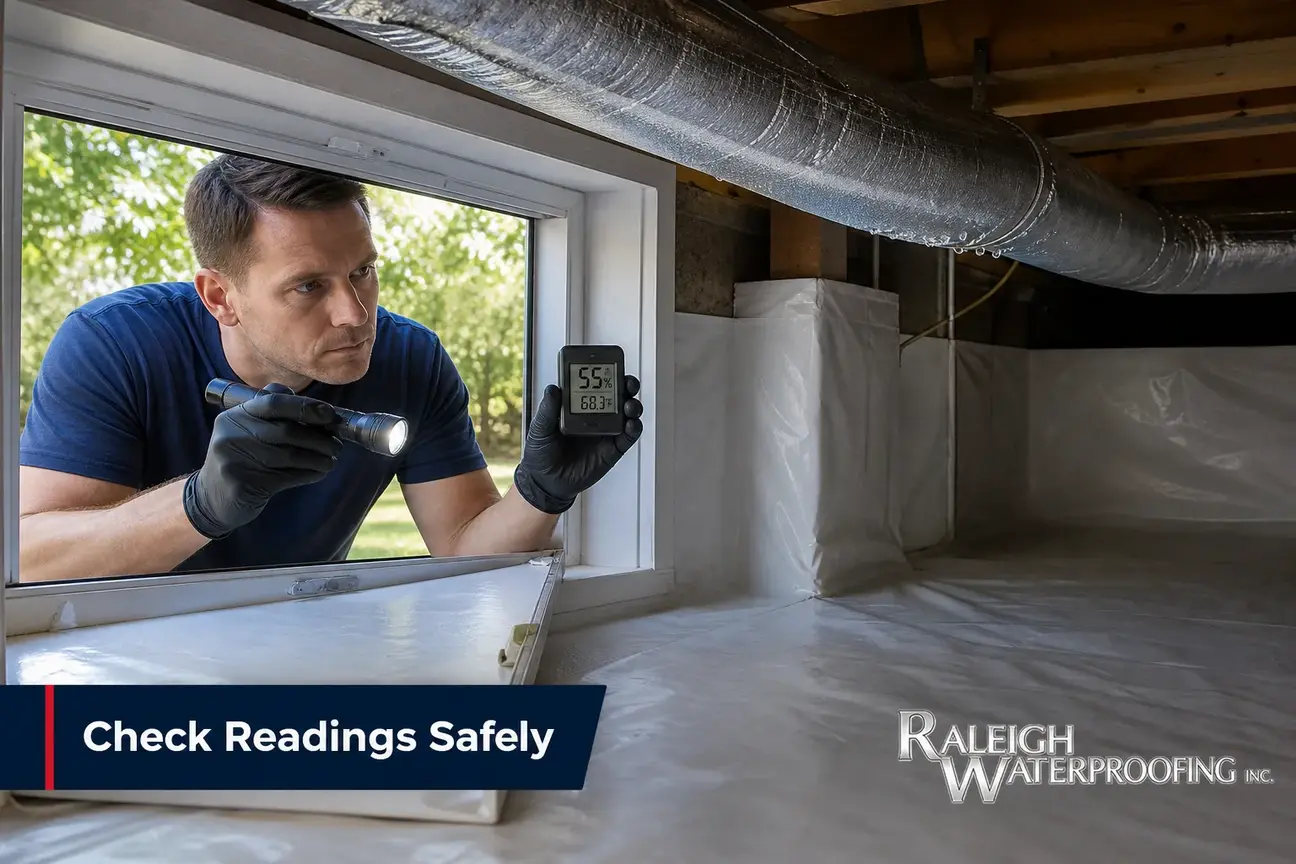
You do not need to crawl through unsafe areas to gather useful information. Start with timing. Note whether the issue appears after rain, during humid weather, when the air conditioner runs, or all season. If you have a hygrometer, record humidity levels at similar times of day so the readings can be compared.
Next, look from the outside. Check whether downspouts discharge close to the foundation, whether gutters overflow, whether soil slopes toward the house, and whether mulch or landscaping is trapping water against the crawl-space wall. Look for soggy areas near the crawl access, low spots near the foundation, or water crossing walkways.
From the crawl entrance, without entering unsafe conditions, look for obvious clues: wet liner areas, standing water, loose seams, condensation, open vents, damaged access doors, or staining along one wall. If you see water near electrical equipment, unsafe access, suspected sewage, or a plumbing supply leak, stop and call the appropriate professional.
Before any digging for drainage or exterior work, use NC 811. The NC 811 utility notification system is the proper starting point before excavation. Homeowners should also avoid working in unshored trenches; OSHA’s trenching and excavation guidance explains why trench safety requires proper protection. Excavation and trench conditions can be dangerous, and permit requirements can vary by jurisdiction.
When high humidity levels point to a bigger water problem
High humidity levels after encapsulation deserve attention when they persist, repeat after storms, or appear with liquid water. A single elevated reading may reflect weather, open access, or recent work in the crawl space. A pattern is more useful than one number.
Get an on-site evaluation when you see water below the liner, recurring wet edges, a dehumidifier that runs often without stabilizing the space, or musty odors that return after rain. The same applies when the crawl access area is wet, when downspouts discharge near the foundation, or when a low yard area holds water beside the home.
If you see bowing, displacement, widening cracks, settlement, or other movement, consult a structural engineer. If you suspect a supply, sewer, or septic leak, contact a plumber or the proper utility professional. Raleigh Waterproofing Inc. does not diagnose structural engineering issues, plumbing defects, mold health questions, or sewer problems. The moisture pattern may still matter, but the right professional should handle those concerns.
How an on-site evaluation connects the fix to the cause
An on-site crawl-space evaluation should look outside and inside. Outside, the evaluator looks at roof runoff, downspouts, slope, low areas, drainage outlets, crawl access elevation, and where water would go during a storm. Inside, the evaluation looks at liner continuity, wet areas, wall staining, pier detailing, access sealing, vent closures, dehumidifier drainage, and whether liquid water is present.
For crawl spaces that remain damp after earlier work, crawl space repair may include correcting damaged moisture-control components or addressing water-related deterioration that is visible during the inspection. That does not mean every symptom has the same repair. It means the condition of the space should be evaluated along with the water source.
If the main problem is exterior water, the solution may be drainage and grading. If the issue is ground vapor, the vapor barrier details may need attention. If the space is leaking humid air, the sealed crawl space details may need correction. If collected water has no gravity outlet, sump support may be considered. If several sources are present, the fix may need to be staged in the order that removes the largest moisture load first.
After the source is reduced, the crawl space dehumidifier can do the job it is meant to do: manage remaining airborne moisture. That is different from asking it to overcome water below the liner, a downspout problem, or a crawl door that admits humid outdoor air.
Cost drivers without guessing at prices
The cost of correcting crawl space moisture depends on what is found, not on the humidity reading alone. Important drivers include crawl-space access, height, liner condition, drainage needs, outlet options, sump requirements, electrical coordination, grading, landscaping disturbance, and whether previous work must be repaired or removed.
Exterior drainage and grading can also vary because the property has to provide a safe, appropriate discharge path. Water should not be directed onto a neighboring property, into a sanitary sewer, or across a sidewalk. If excavation is involved, local requirements and safety considerations may affect the work plan.
That is why a generic price does not help a homeowner choose the right repair. A home with a small air-sealing gap and an intact liner is different from a home with water under the liner after every storm. The right scope follows the cause.
What maintenance helps after the repair
Once the crawl space has been evaluated and corrected, maintenance keeps the system from being undermined. Keep gutters clean and confirm downspouts discharge away from the foundation. Watch for landscaping changes that create low spots. Do not store sharp materials on the liner. Check the crawl access after storms. Make sure the dehumidifier drain remains clear and that any sump discharge stays directed away from the foundation.
Humidity levels should be monitored as a trend. A reading taken during a wet spell may not mean the same thing as a reading taken during mild weather. If the number rises and stays high, or if the same wet area returns, treat that as a clue that the source needs another look.
Moisture control also depends on the rest of the home. HVAC condensation, plumbing leaks, and exterior maintenance can all affect the crawl space. If the evidence points to plumbing or HVAC, bring in the appropriate trade rather than treating every wet spot as a waterproofing issue.
Bringing the system back into balance
Crawl space humidity is controlled best when the source is addressed before the air is fine-tuned. Encapsulation, drainage, sealing, vapor barriers, sump support, and dehumidification all have a role, but they are not interchangeable. A liner slows ground vapor. Drainage moves liquid water. Sealing limits humid air intrusion. A dehumidifier manages what remains in the air.
If your encapsulated crawl space still has recurring moisture, Raleigh Waterproofing Inc. can help trace the likely water source and match the repair to the cause. Homeowners in the greater Raleigh area can request a free estimate, call 919-877-9969, or email [email protected].
General homeowner information. The right waterproofing or drainage solution depends on an on-site evaluation of the property.
Frequently Asked Questions
Why does crawl space humidity come back after encapsulation?
It usually comes back because moisture is still entering somewhere. Common causes include bulk water below the liner, a damaged or incomplete vapor barrier, humid air leaks at vents or the crawl door, poor drainage outside the foundation, or a dehumidifier that is responding to a larger water source.
What is the difference between ground moisture, bulk water, and humid air intrusion?
Ground moisture is vapor coming from exposed or poorly isolated soil. Bulk water is liquid water from runoff, groundwater, drainage problems, or water collecting below the liner. Humid air intrusion happens when outside air enters through gaps, vents, doors, or penetrations and raises the moisture load inside the crawl space.
Can a dehumidifier fix a crawl space by itself?
A dehumidifier can help control airborne moisture, but it should not be expected to solve standing water, wet soil under the liner, poor grading, or a leaking crawl access. If liquid water or humid air leaks are still present, the dehumidifier may run often without stabilizing the space.
Why do gutters, downspouts, and grading matter after encapsulation?
They control how much water reaches the foundation. If roof runoff or surface water is directed toward the crawl space, the liner and dehumidifier may be forced to manage moisture that should have been moved away outside. Exterior water control often makes the crawl-space system work more effectively.
What does water under a vapor barrier usually mean?
Water under a vapor barrier often points to bulk water, groundwater, perimeter water entry, or a low point where water is collecting. It is not just an indoor humidity problem. The source and drainage path should be evaluated before assuming the liner alone is the issue.
When does a sealed crawl space need a sump or interior drain support?
Sump or drain support may be considered when water collects at the perimeter or below the liner and does not have a practical gravity outlet. It depends on the site, slope, water volume, discharge location, and whether exterior drainage can reduce the water before it reaches the crawl space.
Do closed crawl spaces require a permit in North Carolina?
Closed crawl-space work can require a permit in North Carolina. Homeowners should confirm current requirements with their local building department before work begins, especially when sealing, mechanical drying, electrical work, or other code-related changes are involved.
What should a homeowner document before an inspection?
Document when moisture appears, where it appears, how high the humidity readings are, whether the dehumidifier runs constantly, and what happens after rain. Photos of wet liner areas, downspouts, soggy yard spots, and crawl access conditions can help the evaluator connect the symptom to the likely source.